

Are you looking to improve the energy efficiency and aesthetic appeal of your mobile home? Look no further than your window sills. These often-overlooked features are essential for any mobile home’s exterior, providing a barrier against the elements while enhancing its overall appearance. In this article Replacing Mobile Home Window Sills: DIY Guide we will discuss all the issues that develop with mobile home window sills.

Replacing Mobile Home Window Sills
Concrete, stucco, and exterior sills are common materials used for mobile home window sills. Due to the unique structures of mobile homes, specific sizes and shapes of sills may be required for proper installation.
But where can you find these specialized products? Many retailers offer a variety of concrete and stucco sills specifically designed for mobile homes. It’s best to consult with a professional who specializes in mobile home windows.
Investing in quality window sills is an investment in your home’s longevity and curb appeal. So why wait? Upgrade your mobile home today with new window sills!
Common Issues with Mobile Home Window Sills and How to Fix Them
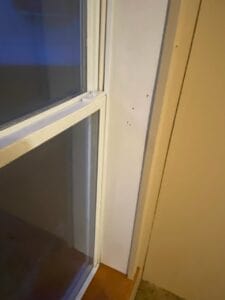
Mobile homes are a popular housing option for many people, but they come with their own set of unique challenges. One of the most common issues that mobile homeowners face is problems with their window sills. From rotting to cracking and warping, these issues can cause significant damage if left unaddressed.
Rotting Window Sills: Replacing Mobile Home Window Sills
Rotting window sills are a common problem in mobile homes, especially those that are older or have been exposed to moisture over time. The first step in fixing this issue is to remove the damaged area carefully. Once you have removed all of the rotten wood, you can replace it with a new piece of wood cut to size.
To prevent future rotting, make sure your windows are adequately sealed and maintained regularly. You may also want to consider treating your window sills with a water-resistant coating or paint specifically designed for outdoor use.

Cracked or Warped Window Sills
Cracks and warping in mobile home window sills can occur due to exposure to harsh weather conditions or general wear and tear over time. To fix these issues, start by sanding down the affected area until it’s smooth and even.
Once you’ve smoothed out any rough areas, apply a sealant or paint specifically designed for outdoor use. This will help protect your window sill from further damage caused by exposure to moisture or other elements.
Mobile Home Window Seal Repair
If your mobile home windows are leaking, it could be due to a problem with the seals around them. Over time, seals can become worn or damaged, allowing water and air into your home.
To repair a broken seal on your mobile home windows:
Remove any old caulk or sealant from around the window frame.
Clean the area thoroughly with a damp cloth and let it dry completely.
Apply a new layer of caulk or sealant around the window frame, making sure to fill any gaps or cracks.
Mobile Home Window Seals
Mobile home window seals are essential for keeping your home comfortable and protected from the elements. Over time, these seals can become worn or damaged, allowing air and water to seep into your home.
To maintain your mobile home window seals:
Check them regularly for signs of wear or damage.
Replace any worn or damaged seals as soon as possible to prevent further damage.
Why Do Window Sills Get Mold?
Mold can grow on mobile home window sills due to exposure to moisture over time. This can be caused by leaks in your windows or even high humidity levels inside your home.
To prevent mold growth on your mobile home window sills:
Make sure your windows are adequately sealed and maintained regularly.
Keep your indoor humidity levels below 60% by using a dehumidifier if necessary.

Different Types of Materials for Mobile Home Window Sills and Their Pros and Cons
Mobile homes are a popular choice for many homeowners due to their affordability, flexibility, and convenience. There are several materials available that can be used to enhance the appearance and functionality of your mobile home.
Concrete
Concrete is a popular material for mobile home window sills due to its durability and long-lasting nature. It requires little maintenance and is resistant to moisture and pests. Concrete window sills can withstand harsh weather conditions such as extreme heat or cold without cracking or warping.
Pros:
Durable
Long-lasting
Little maintenance required
Resistant to moisture and pests
Cons:
Heavy
Difficult to install
May crack over time
If you decide to go with concrete window sills, it’s important to hire a professional contractor who has experience working with this material. They will be able to properly install the concrete sills while ensuring they are level and secure.
Wood: Replacing Mobile Home Window Sills
Wooden window sills are another popular choice for mobile homes as they provide a natural look that blends well with the surroundings. Wood is also relatively easy to work with, making it an ideal option if you’re looking for a DIY project.
Pros:
Natural look
Easy to work with
Can be painted or stained in any color
Cons:
Requires regular maintenance (painting, staining)
Susceptible to rotting or warping if not properly maintained
Not as durable as other materials (may need replacement sooner)
If you choose wood window sills, make sure you use treated wood that is resistant to moisture and pests. You should also regularly inspect them for any signs of damage or wear-and-tear.
Vinyl
Vinyl window sills are a great option if you’re looking for something low-maintenance and affordable. They come in a variety of colors and styles, making it easy to find one that matches your mobile home’s exterior.
Pros:
Low-maintenance
Affordable
Resistant to moisture and pests
Cons:
Not as durable as other materials (may need replacement sooner)
Limited color options compared to other materials
If you decide to go with vinyl window sills, make sure they are properly installed by a professional contractor. Improper installation can lead to water damage or warping.
Metal: Replacing Mobile Home Windows Sills
Metal window sills are a popular choice for their durability and sleek appearance. They come in various metals such as aluminum, steel, or copper, each with its own unique look.
Pros:
Durable
Sleek appearance
Resistant to moisture and pests
Cons:
Can be expensive compared to other materials
May require regular maintenance (painting)
If you choose metal window sills, make sure they are properly installed by a professional contractor who has experience working with this material. You should also regularly inspect them for any signs of rust or corrosion.
Steps on How to Replace a Window Sill in a Mobile Home
If you own a mobile home, you may need to replace your window sill at some point. The process of replacing a window sill can seem daunting, but with the right tools and materials, it can be done quickly and easily.
Check out our article: Buying a Used Mobile Home
Gather the necessary tools and materials before starting the replacement process.
Before beginning the replacement process, it is essential to gather all the necessary tools and materials. Here is a list of what you will need:
Safety goggles
Work gloves
Pry bar
Hammer
Screwdriver
Saw (hand or power)
Measuring tape
New window sill material (wood or PVC)
Adhesive (silicone or construction adhesive)
Screws (long enough to penetrate through both the new sill and wall framing)
Remove the old window sill carefully to avoid damaging the surrounding area.
The first step in replacing your mobile home’s window sill is removing the old one. Follow these steps for safe removal:
Put on safety goggles and work gloves.
Use a pry bar and hammer to remove any trim around the old window sill.
Carefully remove any screws holding the old sill in place.
Use a saw to cut through any caulk or adhesive holding the old sill in place.
Gently pry out the old sill from its position using an upward motion.
Be careful when removing the old window sill not to damage any surrounding areas such as drywall or insulation.

Install the new window sill by securing it with screws and adhesive.
Once you have removed the old window sill, it’s time to install your new one. Follow these steps:
Measure your new windowsill material against where you removed your previous one. Cut the new sill to size using a saw if necessary.
Apply adhesive (silicone or construction adhesive) to the bottom of the new window sill.
Carefully place the new sill into position, making sure it is level and flush with the surrounding area.
Secure the new window sill in place by drilling screws through both the sill and wall framing.
Finish the replacement process by caulking and painting the new window sill.
After installing your new window sill, you will need to finish up by caulking and painting it to match your mobile home’s interior design. Follow these steps:
Use a caulk gun to apply a bead of caulk around all edges of your new window sill.
Smooth out any excess caulk using a damp finger or caulk smoothing tool.
Allow time for the caulk to dry completely before proceeding.
Paint your new window sill with an appropriate paint color that matches your mobile home’s interior design.
By following these simple steps, you can replace a window sill in your mobile home quickly and easily without professional help.
Preparation before Replacing a Window Sill: Tools Needed and Safety Measures
Necessary Tools for Replacing a Window Sill
Replacing a window sill in your mobile home can be a daunting task, but with the right tools, it can be done efficiently. The necessary tools for replacing a window sill include:
Pry bar
Hammer
Saw (circular or hand saw)
Drill
Screws
Caulking gun
A pry bar is essential when removing the old window sill. It helps to remove nails or screws that hold the sill in place. A hammer is needed to tap the pry bar gently and loosen the old window sill.
A saw is required to cut through any nails or screws that may still be holding the old window sill in place. You can use either a circular saw or hand saw depending on which one you are comfortable using.
A drill is needed to make holes for new screws when installing the new window sill. Make sure you have different drill bits of various sizes, so you can choose one that fits your screw size.
Screws are used to attach the new window sill securely. Choose screws that are long enough to go through both the new sill and into the framing below it.
Finally, a caulking gun is required to seal any gaps between the wall and new window sill after installation.
Safety Measures to Take Before Replacing a Window Sill
Before starting any DIY project such as replacing your mobile home’s window sills, safety should always come first. Here are some safety measures you need to take:
Turn off power: If there are electrical outlets near where you will be working, turn off their power supply at your home’s main circuit breaker panel.
Wear protective gloves: Always wear protective gloves while working on your windowsills as they can easily cause finger injuries if not handled carefully.
Inspect outside of windows: Check the exterior of your mobile home’s windows for any signs of damage or water leakage. If you find any, fix them before replacing the window sill.
Check kitchen area: Before you start, check if there are vents in the kitchen area that may need to be temporarily removed to access the window sill.
Removing the Old Window Sill: Step-by-Step Guide
If you are planning to replace your window sills in a mobile home, removing the old ones is an essential first step. This may seem like a daunting task, but with the right tools and approach, it can be done quickly and efficiently. In this guide, we will walk you through the process of removing your old window sill to make way for a new one.
Single Pane Windows are Easier to Remove than Double Pane Windows
Before getting started, it’s important to note that single pane windows are easier to remove than double pane windows. This is because double pane windows have two layers of glass that are sealed together, making them more difficult to disassemble. If you have double pane windows in your mobile home, it’s best to seek professional help or consult with an expert before attempting to remove them yourself.
Removing an Old Window Sill is Necessary Before Installing a New One
Removing an old window sill is necessary before installing a new one. The old sill must be removed so that the new one can fit properly and securely into place. Removing the old sill ensures that any damage or decay beneath it can be addressed before installing the new sill.
The Old Window Sill Should Be Removed Flush with the Wall
When removing an old window sill from a mobile home, it’s important to remove it flush with the wall. This means cutting away any excess material until only the flat surface of the wall remains. Doing so will ensure that there is enough space for your new window sill without any gaps or uneven surfaces.
Use a Pry Bar and Hammer to Carefully Remove the Old Window Sill
To remove an old window sill from your mobile home, you’ll need a few basic tools including a pry bar and hammer. Here’s how:
Begin by prying off any trim or molding around the edge of the window sill. Use your pry bar to gently pry away any nails or adhesive holding the trim in place.
Once the trim is removed, use your pry bar to carefully lift up one end of the old window sill.
Use a hammer to tap the end of the pry bar and loosen the old sill from its position.
Continue prying and tapping until you can remove the entire old window sill from its position.
Finally, clean up any debris or remaining material from around the window frame so that you have a clean surface for installing your new sills & replacing mobile window sills.
Removing an old window sill may seem like a daunting task, but with a little patience and attention to detail, it can be done quickly and efficiently. Follow these steps carefully, and you’ll be well on your way to installing new, beautiful window sills in your mobile home!
You might also be interested in our article Mobile Home Windows
Installing the New Window Sill: Step-by-Step Guide
Preparation
Before installing a new window sill, you need to prepare the area. Start by removing the old windowsill and cleaning the surface. Make sure there are no nails or screws sticking out that could interfere with the installation of the new windowsill.
Cutting and Attaching
Once you have prepared the area, it’s time to cut and attach the new windowsill. Measure the opening to determine how much material you will need for your new windowsill. Cut the new windowsill to fit using a saw or other cutting tool.
Attach your new windowsill to the frame using screws or nails. Make sure it is level and secure before moving on to the next step.
Paneling or Drywall Installation
To give your window a finished look, install paneling or drywall around the sides of the windowsill. This will also help prevent drafts from entering your home through gaps in your walls.
Measure and cut pieces of paneling or drywall to fit around your window sill. Use construction adhesive to attach them securely in place.
Molding Addition
Adding molding around your window can enhance its appearance while also providing additional insulation against drafts. Choose molding that complements your existing decor style for best results.
Measure and cut pieces of molding to fit along each side of your window sill. Attach them using finishing nails, making sure they are flush with both wall and sill surfaces.
Painting: Replacing Mobile Home Window Sills
The final step in installing a new window sill is painting. Paint both walls and ceiling around your newly installed window sill with matching colors for seamless integration into existing decor styles.
Use high-quality paint that is resistant to moisture damage for best results over time since water damage can cause issues such as peeling paint, mold growth, and structural damage if left untreated over time. This should complete the process of replacing mobile home window sills
Conclusion: Replacing Mobile Home Window Sills
In summary, choosing the right material for your mobile home window sills is crucial to ensure their longevity and durability. Different materials have their pros and cons, so it’s essential to weigh them carefully before making a decision. Proper maintenance is necessary to prevent common issues such as rotting or warping.
Before replacing a window sill in your mobile home, make sure you have the necessary tools and take safety measures seriously. Removing the old window sill requires careful attention to avoid damaging surrounding areas. Installing the new one involves following step-by-step instructions carefully.
To maintain your mobile home window sills properly, keep them clean from debris and moisture. Regularly check for any signs of damage or wear and tear that need fixing immediately.
In conclusion, investing in quality materials and taking care of your mobile home window sills can save you money in the long run by preventing costly repairs or replacements.
FAQs: Replacing Mobile Home Window Sills
Q1: What are some common materials used for mobile home window sills?
A1: Some common materials used for mobile home window sills include wood, vinyl, aluminum, fiberglass, and composite materials.
Q2: How do I know if my mobile home window sill needs replacement?
A2: Signs that your mobile home window sill needs replacement include rotting, warping, cracking or splitting of wood; discoloration or rusting of metal; or chipping or fading of paint on vinyl or other synthetic materials.
Q3: Can I replace a mobile home window sill myself?
A3: Yes, with proper preparation and safety measures taken into account along with following step-by-step instructions carefully.
Q4: How often should I inspect my mobile home window sills?
A4: It’s recommended to inspect your mobile home window sills at least once per year for any signs of damage or wear and tear.
Q5: What are some maintenance tips for mobile home window sills?
A5: Some maintenance tips for mobile home window sills include keeping them clean from debris and moisture, checking for signs of damage regularly, and fixing any issues immediately to prevent further damage.
Q6: How much does it cost to replace a mobile home window sill?
A6: The cost of replacing a mobile home window sill varies depending on the material used, the size of the window sill, and labor costs. It’s best to get a quote from a professional contractor before making any decisions.
Q7: Can I paint my mobile home window sills?
A7: Yes, you can paint your mobile home window sills as long as you use the appropriate type of paint for the material used in your window sill.
Q8: How long do mobile home window sills typically last?
A8: The lifespan of mobile home window sills depends on various factors such as the material used, weather conditions, and proper maintenance. Generally speaking, they can last anywhere from 10-30 years with proper care.
You might also be interested in our articles: