
How to Winterize a Mobile Home: Complete Step-by-Step Guide
Protect your mobile home from freeze damage. Step-by-step winterization process with photos, a tools list, typical costs, and a free printable checklist.

Free Printable Winterization Checklist
Print this checklist and check off each step as you walk through your home. Don’t skip a step — one missed drain or fitting can crack and leak once the heat is off.
Download Free Checklist (PDF)Why Winterization Matters
If you’re leaving your mobile home vacant with the heat off — even for a few weeks — proper winterization is the difference between coming back to a home and coming back to a disaster. Mobile home plumbing runs underneath the structure, exposed to cold air and wind. When that water freezes, pipes burst. One burst pipe can cause serious, costly water damage before anyone notices.
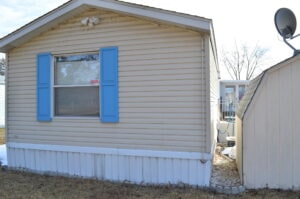
Proper skirting is your first line of defense — but winterization protects everything inside.
Water freezes at 32°F. Skirting and underbelly insulation give the pipes under a mobile home some protection, so they may not freeze the moment the air hits 32°F — but there’s no reliable “safe” temperature. Gaps in skirting, wind exposure, extended cold snaps, and torn or missing underbelly insulation all make freezing more likely. In cold climates, a home left without heat should be winterized.
The bottom line: Winterizing costs very little compared with repairing burst pipes, a ruined water heater, or water-damaged floors. See the cost comparison below for typical ranges.
Tools and Supplies You’ll Need
Gather everything before you start. The whole process usually takes a few hours, and you don’t want to stop midway to run to the hardware store.
As an Amazon Associate I earn from qualifying purchases.
Air Compressor
Used for blowing water out of the supply lines. A small pancake compressor with a pressure regulator works fine — you don’t need anything heavy duty.
View on AmazonRV Antifreeze (Pink)
Antifreeze labeled safe for drinking-water plumbing. You’ll need 2–3 gallons. Never use automotive antifreeze — it’s toxic and will contaminate your water supply.
View on AmazonShop Vacuum
Used to remove standing water from toilet tanks and bowls. A small wet/dry shop vac is all you need.
View on AmazonPortable Generator
Only needed if the home has no power. Runs the air compressor and shop vac. Never run a generator indoors, under the home, or in a garage or porch — keep it outside and well away from doors and windows (carbon monoxide).
View on AmazonYou’ll also need a garden hose for draining the water heater, a garden hose adapter for the air compressor, wrenches, and basic hand tools. A piece of cardboard to lie on while working under the home makes the job much more comfortable.
Step-by-Step Winterization Process
1Shut Off the Main Water Supply
Find your main water shutoff valve under the mobile home — it’s typically located in the middle or rear section near where the water line enters the home. Turn it completely off. If you live in a park and the valve won’t turn, contact park maintenance. If you own your land, your shutoff may be at the meter near the road. For help locating your valve, see our mobile home water shutoff valve guide.
2Drain the Hot Water Heater
First, turn off the power: switch off the water heater breaker at your electrical panel (for a gas or propane water heater, turn the gas control to “off”). Running an electric water heater with an empty tank will burn out the heating elements. Give the water time to cool so you aren’t draining scalding water.
Then connect a garden hose to the drain valve at the bottom of the water heater and run it outside, sloped downward away from the home. Open a hot-water faucet in the home so air can get into the tank, then open the drain valve slowly and let the tank drain completely — this can take around an hour.
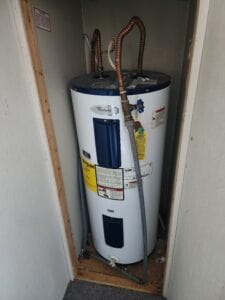
The drain valve is at the bottom of the water heater — connect your garden hose here.
3Open Every Faucet in the Home
Turn on every hot and cold faucet in the home — kitchen, bathroom sinks, bathtub, shower, and any outdoor spigots. Flush every toilet. This removes standing water from the supply lines and creates airflow for the blowout process in the next step. Leave all faucets in the open position.
4Blow Out the Water Lines
This is the most important step. Connect your air compressor to the laundry hookup connections using a garden hose adapter. Remove the washer supply lines first, then attach the compressor. Set the compressor’s regulator low — around 40–50 psi is a common guideline — rather than blasting full tank pressure through older plastic lines and fittings. Blow out both hot and cold lines for about 5 minutes each. You’ll hear air and water sputtering from the open faucets throughout the home. Keep going until only air comes out — no more water. If you don’t have laundry hookups, you can connect at any accessible supply line under the home.
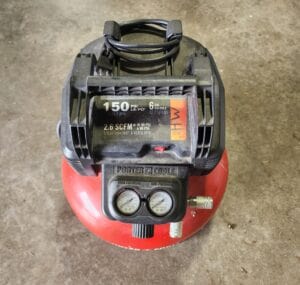
A small pancake compressor is all you need to blow out your water lines.
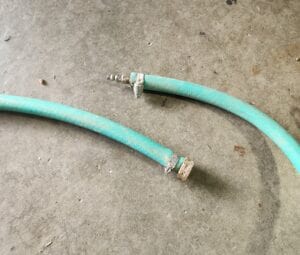
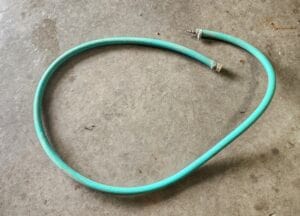
The garden hose adapter (left) connects your compressor to the laundry supply lines.
5Add RV Antifreeze to Every Drain
Pour RV antifreeze (the pink kind labeled for plumbing) down every drain in the home. Every sink, tub, shower, and floor drain has a P-trap underneath that holds standing water. That water will freeze and crack the trap if you don’t protect it. Pour about half a cup of antifreeze down each drain. This is cheap insurance — a gallon of RV antifreeze costs only a few dollars and covers a lot of drains.
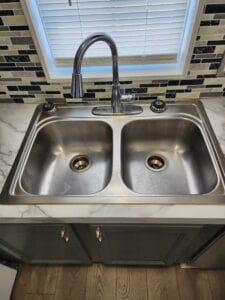
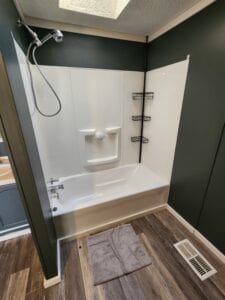
Every drain gets antifreeze — kitchen sinks, bathroom sinks, showers, and tubs.
6Winterize the Toilets
Use your shop vacuum to remove all standing water from the toilet tank and bowl. Get as much water out as possible. Then add 2–3 inches of RV antifreeze to both the tank and the bowl. This protects the porcelain and the internal parts from cracking when temperatures drop. Do this for every toilet in the home.
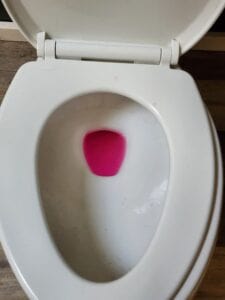
Pink RV antifreeze in the toilet bowl and tank — the final step before closing up.
7Final Steps: Power and Appliances
Confirm the water heater breaker (or gas control) is still off. Shut off the HVAC system. Pour antifreeze into the dishwasher drain if your home has one. Unplug all appliances. For homes that will be vacant for extended periods, consider shutting off the main electrical breaker entirely. Walk through the home one final time and verify every faucet is open, every drain has antifreeze, and the water heater is off.
Critical reminder: Never use automotive antifreeze in your plumbing — it’s toxic and will contaminate your water supply. Always use pink RV antifreeze labeled for drinking-water systems. And always shut off the water heater breaker before draining — running the heating elements dry will burn them out, and replacing them adds cost you don’t need.
De-Winterization in Spring
When temperatures warm up and you’re ready to restore your home’s water system, reverse the process carefully. Close all faucets first. Make sure the water heater drain valve is closed — if you restore water with the drain open, you’ll flood the closet. Slowly turn on the main water supply. Then go through the home and open each faucet one at a time, hot and cold, and close it once water flows steadily with no sputtering. Expect loud gurgling and sputtering as air clears from the lines — that’s normal.
Leave the water heater breaker off until the tank is completely full — you’ll know it’s full when a hot-water faucet runs a steady stream of water with no air spurting out. Only then turn the breaker back on (or relight/turn on the gas water heater following the label instructions). Flush the toilets and run every faucet for a few minutes to flush out any remaining antifreeze. Inspect all visible pipes, connections, and fixtures for leaks or cracks. Check under sinks, behind toilets, and at the water heater connections. If you find a leak, see our water leak under a mobile home guide for help.
Cost of Winterizing vs. Cost of Damage
These are rough ranges — actual prices vary a lot by area, the size of the home, and the extent of the damage.
| Winterization | Typical Cost |
|---|---|
| DIY winterization (supplies only) | $30 – $75 |
| Professional winterization | $150 – $300 |
| Freeze Damage (Without Winterization) | Typical Cost |
|---|---|
| Single burst pipe repair | $500 – $2,000 |
| Water damage restoration | $2,000 – $10,000+ |
| Water heater replacement | $800 – $2,500 |
| Flooring replacement | $3,000 – $8,000 |
| Cracked toilet replacement | $200 – $500 |
Even hiring a professional to winterize your home usually costs less than a single freeze-damage repair. If you’re doing it yourself, supplies typically run under $75 — assuming you already own or can borrow an air compressor.
Would You Rather Sell Than Repair?
If your home already needs plumbing, floor, or electrical repairs before winterizing even makes sense, selling it as-is is one option to compare. I buy mobile homes that need work, and you don’t have to fix anything first.
Frequently Asked Questions
How do I winterize my mobile home if I’m still living in it?
If you’re staying in your home through the winter, you don’t need to drain the plumbing. Instead, focus on prevention: make sure your skirting has no gaps, keep the heat on, open cabinet doors under sinks on cold nights to let warm air reach the pipes, and let faucets drip slightly during extreme cold snaps. Heat tape on vulnerable pipes under the home adds extra protection — install it according to the manufacturer’s instructions and plug it into a GFCI-protected outlet.
When should I winterize my mobile home?
Winterize when overnight temperatures are regularly dropping below 32°F, or anytime you’re leaving the home vacant with the heat off during cold months. In Michigan and other northern states, that’s usually October or November. Don’t wait for the first hard freeze — winterize before it arrives.
Can I winterize my mobile home myself?
Yes. Most homeowners can complete the process in a few hours with basic tools. You need an air compressor, a garden hose, a shop vacuum, RV antifreeze, and wrenches. Follow the step-by-step process above and use the free printable checklist. If you’re not comfortable doing it, a professional typically charges around $150–$300.
What happens if I don’t winterize my mobile home?
Frozen water expands and can burst pipes, crack toilets and P-traps, damage the water heater, and flood your home. A burst pipe in a vacant home can run for days or weeks before anyone notices — leading to ruined flooring, mold growth, and structural damage that can cost thousands to repair. The supplies to winterize cost far less.
Can I use automotive antifreeze instead of RV antifreeze?
Never. Automotive antifreeze (ethylene glycol) is toxic to humans and animals and will contaminate your plumbing. Always use pink RV antifreeze that’s labeled safe for drinking-water systems (usually propylene glycol based). It costs a few dollars a gallon at most hardware stores or online.
How do I de-winterize in the spring?
Close all faucets, make sure the water heater drain valve is closed, slowly restore the main water supply, then open faucets one at a time to release air and close them once water runs steadily. Let the water heater fill completely before turning the breaker back on. Run all faucets for a few minutes to flush out antifreeze. Inspect everything for leaks before using the home normally.
Is it worth winterizing an older mobile home that needs a lot of work?
Usually, yes — winterizing is inexpensive, and it keeps the damage from getting worse while you decide what to do. If the home already needs expensive plumbing repairs or has water damage, compare the total repair cost with what the home is worth before putting more money into it.