
Crawl Space Vapor Barrier:A Mobile Home Moisture Guide
Compare 6 mil vs 10 mil vapor barriers, learn when a concrete vapor barrier makes sense, follow the DIY installation steps, and see typical installation costs.
See DIY MaterialsWhy Your Mobile Home’s Crawl Space Needs a Vapor Barrier
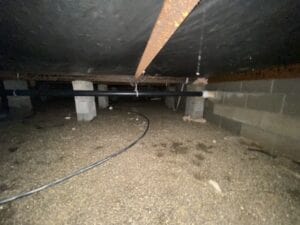
A crawl space vapor barrier (also called a crawl space moisture barrier or vapor retarder) is one of the most cost-effective ways to protect a mobile home from ground moisture, mold, and structural damage. Mobile homes sit elevated above bare ground, which gives moisture an easy path to rise into floors, walls, and insulation.
What the HUD Code says: Under the federal installation standards (24 CFR 3285.204), when the space under a manufactured home is enclosed with skirting, a ground-cover vapor retarder of at least 6-mil polyethylene is required. Thicker material is allowed and often easier to work with, but 6 mil is the minimum.
Structural Protection
Ground moisture rises through soil and can lead to wood rot, floor sagging, and structural damage that is expensive to repair.
Indoor Air Quality
Air from the crawl space can move up into the living space. A vapor barrier helps keep damp air and mold-friendly conditions out from under the floor.
Energy Use
Damp insulation does not insulate well. Keeping the underside of the home dry helps the insulation do its job.
Pest Prevention
Moist crawl spaces attract termites, carpenter ants, and rodents. Cutting down the dampness makes the space less inviting to them.
Health
Crawl space mold and mildew can aggravate asthma and allergies. Controlling moisture at the source helps year-round.
Home Value
Buyers and inspectors look for a dry crawl space. A properly installed vapor barrier is one less problem to explain when you sell.
6 Mil vs 10 Mil Vapor Barrier: Which Do You Need?
Thickness is the main decision when choosing a crawl space vapor barrier. Thicker barriers resist punctures better and hold up to foot traffic during installation. Here is how the common options compare:
As an Amazon Associate I earn from qualifying purchases.
| Feature | 6 Mil Vapor Barrier | 10 Mil Vapor Barrier My pick | 12–20 Mil Heavy Duty |
|---|---|---|---|
| Best For | Meets the HUD minimum; smooth, dry ground | Most mobile homes | Wet sites, rocky ground, high traffic |
| Puncture Resistance | Good | Very good | Excellent |
| Moisture Blocking | Good | Excellent | Excellent |
| Typical Lifespan | 10–15 years | 15–20 years | 20–25 years |
| DIY Friendly | Very easy | Easy | Moderate |
| Average Cost | $0.10–$0.15/sq ft | $0.15–$0.25/sq ft | $0.25–$0.50/sq ft |
| Amazon Link | Shop 6 Mil | Shop 10 Mil | Shop Heavy Duty |
Stephanie’s pick: For most mobile homes, a 10 mil vapor barrier is the sweet spot. It is thick enough to survive foot traffic during installation and resists tears from rocks and debris, without costing much more. A 6 mil vapor barrier meets the HUD minimum and works on smooth, dry ground, but it tears more easily. Go thicker if you have frequent standing water or plan to store items in the crawl space.
Concrete Vapor Barrier: Do You Need One Under a Slab?
Many mobile homes and manufactured homes sit on concrete slabs, piers, or pads. A concrete vapor barrier, also called an under-slab vapor barrier, keeps ground moisture from wicking up through porous concrete into your flooring, subfloor, and home interior.
Important: Concrete is porous. Even on a concrete foundation, moisture from the ground below can rise through the slab. This is especially common in Michigan, Ohio, and Indiana during the spring thaw. A vapor barrier placed between the soil and the slab helps prevent this.
Under New Slabs
Placed directly on the soil before the concrete is poured. Many contractors use 10–15 mil polyethylene under new slabs. Check your local building code and your home’s installation instructions for the requirement in your area.
Existing Concrete Slabs
If your home sits on an existing slab, a moisture barrier can go on top of the slab before new flooring. This is common during renovation to keep moisture from damaging new LVP or laminate floors.
Concrete Block Piers
Homes on concrete block piers still need a ground-cover vapor barrier between the piers, especially when the home is skirted. Without full coverage, ground moisture rises into the space under the home.
For concrete applications: Use a 10–15 mil polyethylene vapor barrier for under-slab installations. For on-top-of-slab applications before flooring, use a dedicated flooring moisture barrier.
Crawl Space Vapor Barrier Installation Cost: What to Expect
A common question is “What does crawl space vapor barrier installation cost?” Costs vary based on home size, barrier thickness, and whether you do it yourself or hire a contractor. Here is a typical breakdown:
| Item | DIY Cost | Contractor Cost | Notes |
|---|---|---|---|
| 6 Mil Vapor Barrier (1,400 sq ft) | $140–$210 | Included in labor quote | Single-wide coverage |
| 10 Mil Vapor Barrier (1,400 sq ft) | $210–$350 | Included in labor quote | Good choice for most homes |
| Seaming Tape | $25–$85 | Included | Butyl tape for a lasting seal |
| Fasteners / Ground Stakes | $15–$40 | Included | Corrosion-resistant |
| Safety Equipment | $45–$120 | Included | Respirator, gloves, knee pads |
| Professional Labor | $0 | $800–$2,500 | Varies by region and access |
| Total Estimated Cost | $200–$600 DIY | $1,000–$3,500 Professional | Get itemized quotes |
Watch for extra contractor charges: Some contractors charge extra for debris removal, mold treatment, or adding a dehumidifier. Get a few quotes and ask for itemized pricing, then compare against doing it yourself. Many homeowners can finish a DIY installation over a weekend with the right materials.
Crawl Space Vapor Barrier Materials
Here is what you need for a mobile home crawl space job. Most of it can be ordered online and delivered.
6 Mil Vapor Barrier
Entry-level crawl space moisture barrier that meets the HUD 6-mil minimum. Lightweight and easy to handle for first-time installers.
- 6 mil polyethylene
- Good puncture resistance
- Easy to cut and install
10 Mil Vapor Barrier My pick
A good fit for most mobile homes. Thick enough to handle crawl space debris, foot traffic during installation, and Midwest winters without a big jump in cost.
- 10 mil polyethylene
- Better puncture resistance
- White makes inspections easier
Vapor Barrier Seaming Tape
Butyl tape seals the seams between vapor barrier sheets. This is the step many DIYers skip, and it is a common reason a barrier fails. Don’t skip the tape.
- Butyl adhesive
- Peel-and-stick application
Crawl Space Dehumidifier
A vapor barrier stops ground moisture, but a dehumidifier handles humid air coming in through vents. Together they make a more complete moisture-control setup. Read the sizing guide before buying.
- Look for auto-restart after power outages
- Built-in pump or drain
- Low-profile design for crawl spaces
Installation Tools
A heavy-duty staple gun and a sharp utility knife make the job go faster. Use corrosion-resistant staples in damp areas.
Staple Gun Utility KnifeMoisture Meter
Check how well your vapor barrier is working over time. A moisture meter and humidity gauge help you catch problems before they turn into expensive repairs.
- Digital moisture readings
- Humidity monitoring
- Pin or pinless models
Safety Equipment
Crawl spaces can contain mold spores, dust, and rodent droppings. The CDC recommends proper respiratory protection when working around mold.
- N95 respirator masks
- Disposable coveralls
- Gloves and knee pads
- Safety glasses
How to Install a Crawl Space Vapor Barrier: Step by Step
Installing a vapor barrier in a crawl space yourself is manageable for most homeowners who are comfortable working in tight spaces. Here is how to do it right:
Fix Water Problems First
Always fix existing water leaks under your mobile home before installing any vapor barrier. Installing over standing water or active leaks traps moisture and makes mold worse. Deal with drainage and plumbing issues first.
Safety Check and Preparation
Put on your respirator, coveralls, and gloves before entering the crawl space. Remove debris, rake the ground smooth, and note any problem areas. Take photos to document conditions before you start.
Measure and Cut Material
Calculate the square footage of your crawl space floor. Most single-wides need 1,000–1,400 sq ft; double-wides need 1,800–2,400 sq ft. Add about 15% for overlaps. Cut your 6 mil or 10 mil vapor barrier into manageable sections.
Lay and Overlap the Barrier
Roll out the vapor barrier from one end and work systematically. Overlap all seams generously (12 inches is a good target) and make sure the whole ground surface under the home is covered with no gaps or holes.
Seal Seams and Edges
Apply butyl seaming tape over every overlap. Hold the edges in place and run the barrier a few inches up the perimeter (foundation wall or skirting), then seal the edges so air and moisture can’t get around it.
Final Inspection and Dehumidifier
Check readings with a moisture meter and do a full visual inspection of all seams. Consider adding a crawl space dehumidifier to handle humid air that enters through vents. That rounds out your moisture-control setup.
Crawl Space Vapor Barrier vs. Complete Encapsulation
Not sure which level of protection you need? Here is a side-by-side look:
| Feature | Crawl Space Vapor Barrier | Complete Encapsulation |
|---|---|---|
| Ground Moisture Control | Excellent | Excellent |
| Wall Moisture Control | Limited | Complete |
| Air Sealing | Minimal | Complete |
| Insulation Integration | Separate | Integrated |
| DIY Friendly | Weekend project | Moderate difficulty |
| DIY Material Cost | $200–$600 | $750–$1,400 |
| Pro Installation Cost | $1,000–$3,500 | $3,000–$8,000 |
| Best For | Basic to moderate moisture issues | Severe moisture, high-humidity climates |
A practical approach: Start with a quality vapor barrier for crawl space protection, then add a dehumidifier. If problems continue after a full season, look at crawl space encapsulation. In the Midwest, many mobile homes do well with a 10 mil vapor barrier plus a good dehumidifier, roughly $400–$800 in DIY materials.
Would You Rather Sell Than Repair?
If moisture has already damaged the floors, subfloor, or framing and the repair list keeps growing, selling the home as-is is one option to compare. I buy mobile homes that need work, and you don’t have to fix anything first.
Crawl Space Vapor Barrier FAQ
Do you really need a vapor barrier in a mobile home crawl space?
If the home is skirted, yes. The HUD installation standards (24 CFR 3285.204) require a ground-cover vapor retarder of at least 6-mil polyethylene when the space under the home is enclosed. Without one, ground moisture rises into the floor system and can lead to mold, wood rot, and floor sagging. A DIY vapor barrier costs a few hundred dollars and is one of the most cost-effective protections available.
What is the best mil thickness for a mobile home vapor barrier?
6 mil is the HUD minimum. For most mobile homes, 10 mil is a better choice because it handles debris, rocks, and foot traffic during installation without tearing as easily. On wet or rocky sites, or if you store items in the crawl space, consider 12–20 mil.
What does crawl space vapor barrier installation cost?
DIY installation typically runs $200–$600 in materials for most mobile homes: the barrier ($140–$350), seaming tape ($25–$85), fasteners ($15–$40), and safety equipment ($45–$120). Professional installation usually runs $1,000–$3,500 depending on your region and access.
What is a concrete vapor barrier and do I need one?
A concrete vapor barrier keeps moisture from wicking up through porous concrete slabs. If your mobile home sits on a slab, ground moisture can still rise through the concrete into your flooring. The barrier goes between the soil and the slab in new construction, or on top of an existing slab before new flooring. Check your local building code and your home’s installation instructions for slab requirements.
Can I install a vapor barrier in my crawl space myself?
Yes. Many homeowners finish a vapor barrier installation over a weekend. Fix any water leaks first, use proper safety equipment, and follow the 6-step guide above.
How long does a crawl space vapor barrier last?
A properly installed 10 mil vapor barrier commonly lasts 15–20 years; 6 mil often lasts 10–15 years. Inspect it every year for tears, gaps, or wet spots, and patch damage with seaming tape or a new overlapping piece right away.
Should I fix water leaks before or after installing a vapor barrier?
Always fix water leaks before installing your vapor barrier. Installing over existing moisture traps water underneath and makes mold worse. Repair plumbing leaks, improve drainage, and fix any water leaks under your mobile home first, then install the vapor barrier on dry ground.
Is a vapor barrier the same as crawl space encapsulation?
No. They are related but different. A vapor barrier covers only the ground surface. Crawl space encapsulation covers the ground and the walls, adds air sealing, and usually includes a dehumidifier. Vapor barriers run about $200–$600 DIY; full encapsulation about $750–$1,400 DIY. Start with a vapor barrier and upgrade later if needed.
More Mobile Home Moisture Control Guides
Affiliate disclosure: CashNowForMyHome.com is a participant in the Amazon Services LLC Associates Program. As an Amazon Associate I earn from qualifying purchases, at no additional cost to you. Prices and availability change, so check current pricing on Amazon before you buy.
General disclaimer: This page is for general educational purposes only. Costs, product specifications, and recommendations vary with your location, home size, and situation. Consult a qualified professional for structural or safety concerns before starting any home improvement project, and check your local code and your home’s installation instructions.